Tuesday, September 30, 2008

We’re Greedy Little Bears

Apparently there is someone who likes foraging for pin cherries as much as we do…bears. Luckily we’re only had one black bear sighting in Rhode Island recently so we weren’t too concerned as we returned to our secret pin cherry patch.

With the help of a boyfriend who was less than willingly dragged along we managed to pick another three quarts of pin cherries (which hardly put a dent in the crop, it seems no one else, animals included, has really caught on yet).

Since we already had pin cherry syrup we wanted a batch of pin cherry jam. We used a variation on the recipes we had for natural fruit jams (as opposed to those which use liquid or powdered pectin) and are thickened and stretched with the pulp from tart apples.

First we made our pin cherry pulp by simmering the cherries with a tiny bit of water, squishing them through a sieve, simmering the leftovers and squishing those again. We ended up with 6 cups of pulp.

We then peeled five Granny Smith apples. I cut out the cores and then chopped the rest and it all went, cores and all, into a solution of ¼ cup lemon juice to 4 cups water. When it was all chopped and treated to prevent browning it got simmered just like the pin cherries and the smooshed with our ricer. This yielded 3 cups apples pulp.

We then combined the pin cherry pulp, apple pulp and 5 cups sugar and simmered until it was thick enough that we thought it would gel.

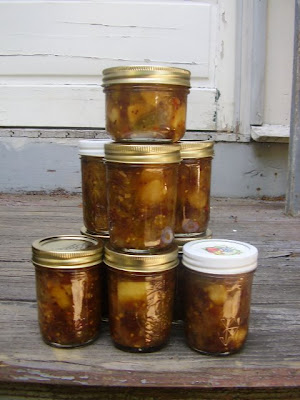
I could say that we then immediately put it into jars with ¼ inch headspace and processed them for 10 minutes…but that would be a lie. Because by this point it was growing rather late in the evening so the pot of jam went onto the porch overnight (it’s getting cool here) and the next day we brought it back to a simmer and canned it. Our yield was about 56 oz. It’s nice and tart and makes an interesting addition to our odd jam collection.


Since we actually invented this recipe here it is:

12 cups pin cherries (which should yield 6 cups pulp)
5 tart apples (yield: approx. 3 cups pulp)
5 cups sugar

(Keep in mind that I only did this once so the amount of pulp you get might vary, even if your ratio was different I'm sure it would still be good. Also, you could always add more sugar if you like it sweeter, although I wouldn't do too much less because I think that's part of what preserves it.)

Saturday, September 27, 2008

Pajama Pants

I don’t know why it didn’t occur to me earlier to make my own pajama pants (perhaps because pants in general are intimidating) but when my favorite pair began to wear out I was left with no other choice.

Since I wanted to duplicate the pair I already owned (and me and patterns don’t play so well together) I decided to just wing it. In order to copy the shape of the pants we just folded the pants along the inseam and traced the shape onto paper. Once we had the basic outline of the front and back panel of a leg we added seam allowances.

Once I had the pattern for the front and back leg pieces I cut these out of some cheap remnant fabric I found at a fabric store and sewed them together. I used a very wide piece of elastic for the waistband and covered it with jersey to imitate the style of the original pair.

Now all they need to be complete is for the bottom of the legs to be hemmed. Which I will…eventually…because I’m really bad about finishing projects.


The Original Pair: Note I left out the drawstring (since they fit so well) and the lovely but unnecessary velour detailing on my pair.

The New Handmade Pair: Note that the legs are clearly too long and still not hemmed. Also, the pattern of the two different legs doesn't match up at all in the front. It bugs mom but I don't really care. I don't usually look at my pants while I sleep. But a good thing to keep in mind if I ever make myself a pair of plaid pants (please stop me if I ever bring up that possibility again.)

Tuesday, September 23, 2008

Roasted Barley Tea

It is starting to get chilly here and in the spirit of frugalness (and by that I mean heating oil is bleeping expensive) we haven’t turned the heat on so we are turning to heating alternatives like baking cookies and drinking tea.


So this was the perfect time to try the roasted barley tea we bought at Asiana (a favorite local Asian foods market) this past summer. Mom had heard good things about it and at $2.99 for 2 pounds it was an affordable experiment. It also was recommended by the cashier at the market.


We followed the recipe on the back which called for 2 tablespoons to 2 litres of water and you boil the barley for five minutes. The smell is very familiar. We finally decided it smells just like burnt popcorn (but in the good way). It’s a very pleasant tea, although it is more reminiscent of coffee then of herbal tea. Our only complaint was that it maybe could be made a little stronger.

Apparently it can also be drunk cold although we missed the boat on that one, unless we get another warm spell I’m not going to be drinking any iced tea, at least not until we turn the heat on.

Frugal Shopping (But Only In Theory)

I recently headed to our local Salvation Army to do some theoretically frugal shopping. It is only theoretically frugal for two reasons.

1. (And this may sound ridiculous to any of you who regularly shop at Bergdorf Goodman, although I kind of doubt that if you do you’d be too interested in my blog. Vicarious frugality?) So the point I was originally trying to make: Salvation Army has gotten expensive! By this I of course mean expensive in comparison to other thrift shops. They want at least $10 for many of their hardcover books! My opinion is that if you are going to charge a premium for used goods (vintage etc.) then your selection should be only the best. But if I have to dig through piles of rubbish to find the one gem (like at Sallie’s) then I shouldn’t be paying premium prices!

2. And the major reason that thrift shopping is only theoretically frugal for me: I end up buying things I don’t need at all and still feel justified because at least they are used!

This most recent trip actually had an explicit mission which was to find an item of clothing that could be used as material for a purse I have planned (look for that in the future…perhaps the distant future). I found it (a shirt for $7, not exactly cheap but it still had the tags on it and it was a rather large size so it actually contains a lot of fabric) but I also found a few other things…that I didn’t need at all.


The first was this adorable casserole. It’s so cute I don’t think I’ll be able to bear using it. I picked it up and examined it and then said to my mom: “Give me a reason not to buy it!” to which she unhelpfully replied: “I can’t!” Turns out she had already picked it up several times and wrestled with buying it herself. So for $3.99 that came home with me.


As did this set of 7 soup plates for $6.99. First I must tell you my justification for buying a set of 7 anything. While you may see it as a set of 8 with one missing, I see it as a set of 6 with a spare to break (which I inevitably will). And now for some praise of soup plates: they are amazing and everything looks way fancier in them. My mom recently found her own set ($6 for 8 at Savers, they are Crate and Barrel and would have been $64 new for the set) and now my boyfriend won’t eat out of anything else. So when I saw these I knew I had to get them, even if they are going into storage until we have our own apartment again.

So there you have it: frugal shopping is frugal if you only buy things you need.

Monday, September 22, 2008

More Foraging: Pin Cherries

This weekend’s hike turned into yet another successful foraging expedition. Although we had left equipped to forage (zip lock baggies) we only expected to find some more rosehips or possibly some bayberries, if even that.


Instead we stumbled upon something which Mom declared was a cherry, probably a pin cherry, before proceeding to eat some. I was a little more cautious and waited to see if she went into convulsions before trying one. They were juicy and tart with a small hard pit in the middle.


Since we weren’t positive what they were we only picked two cups before continuing on our hike. When we got home we did some research and as far as we can tell they most likely are pin cherries. And it’s a good thing we spit out the pits because they and the fall leaves apparently both contain cyanide.


Although we didn’t have enough to do much they were so delicious we wanted to do something so we simmered them with a tiny bit of water until they were soft and then squished them through a sieve (so we could discard the pits). We added sugar to the resulting pulp and ended up with some pin cherry syrup which went into the refrigerator for later use in tea and sodas.


We may go back to attempt to forage more but the birds may have already discovered our secret and it may be too late. In which case we’ll just have to get a pair of pin cherry trees for the yard, it's clearly the only other option.

Thursday, September 18, 2008

What We Did With Rosehips: Part Two

Even after making syrup we had used only two fifths of our rosehip harvest so we decided the rest should become jam since mom had once before made rosehip jam and really liked it.

Although we consulted rosehip jam recipes and other jam recipes we ended up making up our own recipe. We started by preparing the rosehips the same way we had the last batch (taking off the stem and blossom end and chopping them). Then they went into a pan with a little water and simmered until they were all nice and soft. After a little time to cool we mashed them through a sieve with a spoon and collected the resulting puree in a bowl underneath the sieve. For good measure we took the pulp that had not made it through the sieve and repeated the process of simmering and squishing with it and got at least half as much pulp the second time around.

The pulp went into another pot to be simmered to a “jam-like” consistency but once we had added sugar we found it was already at the right consistency. How much sugar to add was a whole other matter though. The amounts given in some of the recipes we consulted just didn’t seem right so we used a ratio of sugar to pulp that seemed fairly consistent with most jam recipes in our canning book. We tasted it, decided it was perfect and poured it into sterilized jars and processed them.


From 3 pounds of rosehips we ended up with 2.5 eight ounce jars. Although this ratio seems pretty pathetic to me I just remind myself that since the rosehips were foraged the only real expenditure was time (and the negligible cost of sugar). And since we enjoy doing this sort of thing I’ll just have to think of it as a nearly free form of entertainment. (Otherwise I might go crazy thinking about the fact that I spent three days picking and preserving rosehips and all I ended up with was a few jars of jam and syrup.)

Sunday, September 14, 2008

What We Did With Rosehips: Part One

This weekend we fell to the task of dealing with the rosehips we had picked. Our first project was to make rosehip syrup, which was a popular use for rosehips in WWII era England as a way to get vitamin C. In fact it appears that everyone is still using the WWII recipe. We used this version.


Since we don’t have a food processor we took the stems and flower ends off by hand and then chopped them. We put them in boiling water, let them sit and then filtered them through our jelly bag. We also did the second filter as the instructions advise, adding more water and letting it sit more, although I’m not sure it was necessary.

We boiled the resulting juice down to the recommended volume and then added sugar and put it into canning jars and bottles. The canning jars we actually processed but the regular jars are just going into the fridge since (as a result of its high sugar content) it will probably keep for quite awhile in there.

Unfortunately our syrup didn’t come out the bright red color I had expected, probably because some of our hips weren’t quite ripe. After tasting it I don’t think I’d put it over ice cream but I can see sweetening my iced tea with it or making a soda with it and seltzer.

And on a completely unrelated note: today we had a new visitor. Mom found this tiny snail on our compost bin (I know it sounds fancy but it’s actually just one of those big Arizona ice tea jugs with part of the top cut out where our compost lives until it can be carried outside). I’ve never actually seen a snail anywhere on our property so I can only assume he hitched a ride here on something.


He was so cute that I didn't mind him leaving a slime trail across my hand as I transported him outside.

Friday, September 12, 2008

Mom's Cereal

Don’t let the fact that I refer to it as “twig and bark” cereal deter you, people who like dry cereal (translate as everyone but me) give my mom’s cereal rave reviews.


Besides being yummy it is also homemade, economical and healthy too! Here’s her recipe:

Cereal recipe:
10 cups rolled oats (2 lb.)
1.5 cups sliced almonds (4 oz.)
2 cups raw cashew pieces (8 oz.)
1.5 cups raisins (8 oz.)
2 cups dried unsweetened bananas (5 oz.)
1 cup brown sugar (4 oz.)

Preheat oven to 350 degrees F. Chop cashews, mix oats and nuts and spread in a large cake or roasting pan in a thin layer. Toast for 15 minutes, stirring once after about 8 minutes. This will require at least two batches or two pans.

While oats cool break the banana chips into small pieces, separate any clumps of raisins and mix sugar with fruit evenly. Add to oats and nuts and mix well.

When completely cool store in airtight containers.

Makes about 17 cups.


(This is the cool chopper we use to chop nuts.)

The closest estimate we could make is that one half cup (a small serving) has about 207 calories and cost about $.24. Mom estimated calories by weighing ingredients, converting to grams and using the USDA's Nutritive Values of Foods.

Some notes on the process: use a pan with sides so you can stir the cereal. Also, bulk oats from a health food store can be much cheaper than supermarket oats and you can also find organic ones.

Thursday, September 11, 2008

Rosehip Foraging

The holy grail of frugal preserving is definitely something you can forage sustainably. For us one of these things is rosehips. Because Rhode Island has something like 400 miles of coastline, and rosehips love being on the coast, we have lots of them. It also helps that not many other people seem to be aware of their usefulness.


Rosehips are a great source of vitamin C and can be used to make tea, syrup and jam. Although we do have a native species of rose its hips are too small to be of much use so we pick from rosa rugosa plants which are actually an invasive alien species (another reason we don’t feel so bad about picking them).

Despite this we’re not sure of the legality of picking them in certain places so at our first stop today we had to be rather stealthy. This entailed climbing on some pretty scary rocky outcroppings to reach hidden bushes. This area (which shall remain unnamed) was too crowded so we only managed to pick 1.5 lbs and that took at least an hour.

On our way home we stopped at a parking area that allows you access to a path that leads (eventually) to the coast. Although we didn’t know for sure there would be any rosehips there we thought it was a pretty good bet and less likely to be crowded.

When we arrived at the beach we were greeted by a line of rosa rugosa plants heavily laden with ripe fruit. We rejoiced and then began filling a plastic bag with ripe ones.

As you know roses are thorny and these are no exception. So jeans, sneakers and gloves are recommended gear for picking. Of course I didn’t have several of those so I suffered in silence. (And by silence I mean that I yelped every few minutes when I’d get a particularly painful prick.)

Our new found site gave us a much bigger yield: we picked another 3.5 lbs bringing us up for a grand total of 5 lbs for the day. Not a bad haul considering the only cost was our time and a little gas money.


Look how big some of these are!


Check back soon to see what we do with all those rosehips!

Monday, September 8, 2008

T-Shirt Skirt

I know, you're thinking "not another t-shirt refashion project!" But I have so many old t-shirts lying around I needed something to do with them! You didn't expect me to just throw them away did you?

Although my project was inspired by ones I had seen online I decided to just make up my own pattern as I went. First I decided how big around my waist band would be (I did this by measuring the waistband of a favorite skirt). I used this measurement not only to cut the piece for the waistband (with an extra inch for seam allowances) but also to decide on the length of the top of each of my trapezoids. Since I planned to do 6 sections I divided my waist measurement by 6 and then added an inch to that for seam allowances. For the bottom of the trapezoid I just added a couple inches. You could change this depending on how much flare (and flair) you want. For the length of the trapezoid I measured to where I wanted the skirt to end and then subtracted the width of the waistband (which I had decided was 4 inches).


I then found three t-shirts that I could cut out 2 trapezoids from each. It was important that the bottom of each trapezoid could fall on the bottom hem of the t-shirt because this saved me finishing and actually made the skirt look much more professional.


I sewed all my trapezoids together and then sewed the two waistband pieces together at the side. I then sewed the top one inch of the waistband down to make a channel for a drawstring. Then I sewed the waistband onto the skirt inside out. Then I seam ripped the entire thing off and sewed it on the right way. I used two strips of t-shirt to make a drawstring. A handy trick for getting your drawstring all the way around is to put a safety pin through the end and use this to push it through the channel.

I decided to use the logo from one of the t-shirts in the skirt (although you can't see it in this picture) because…well I don’t really know why but it looks cool.


Ta da! This skirt is so ridiculously comfy it is quickly becoming one of my favorites. Expect to see more t-shirt refashions in the future whether or not you like it! And no that is not Toaster the cat, that is actually Wiggin the cat and this is his first appearance on the blog because he is the least photogenic of all my cats (sorry Wiggin).

I'm taking the Wardrobe Refashion pledge!

Since the garden is winding down and our glut of canning is just about wrapped up I will now be moving on to more wintery projects like sewing. So this was the ideal time to sign up for the Wardrobe Refashion blog pledge. Below is my pledge and check out the site for some refashionista inspiration. And expect to start seeing a lot more sewing projects!

The Pledge

I Becca pledge that I shall abstain from the purchase of "new" manufactured items of clothing, for the period of 2 months. I pledge that I shall refashion, renovate, recycle preloved items for myself with my own hands in fabric, yarn or other medium for the term of my contract. I pledge that I will share the love and post a photo of my refashioned, renovoted, recycled, crafted or created item of clothing on the Wardrobe Refashion blog, so that others may share the joy that thy thriftiness brings! Signed Becca.

Thursday, September 4, 2008

Lumber Store Tomato

I got home from work today and my dad asked: “Did you see the tomato I got from the lumber store?”


My immediate response was confusion, is the lumber store selling produce now too? But he explained that the woman working there had a basket of free tomatoes on the counter so my dad grabbed a good sized one.

What strikes me about that is that it would probably never happen if you were shopping at a chain store. So there you have it: free tomatoes are another good reason to support your local independent retailers.

Monday, September 1, 2008

Canning Blitz

Here are the results of a few days of canning condensed into one post (prepare yourself).


First the rest of the peaches became “spreadable spicy peaches” (from the Ball Book of Complete Home Preserving) when we mixed them with apples, apple juice concentrate and lemon juice. It cooked down to a nearly jam like consistency and was ladled into hot jars and processed. (But first we taste tested it and decided that although it was supposedly sweetened with the unsweetened apple juice concentrate it really wasn’t sweet enough so we added another cup of sugar which was just enough to bring out the peach flavor over the sourness of the apples.)


We still had some peaches leftover and faced with a potential mutiny if Dad wasn't allowed to make a peach pie (or maybe crumble, which I prefer) we took the rest of the peaches which had already been peeled, pitted and halved and mixed them with sugar and froze them in freezer bags to become instant peach pie (or crumble).


Ever vigilant for frugal opportunities, as Mom and I went to dump out the lemon juice and water mixture that the peaches had floated in (while waiting to be cut up, to avoid browning) we noticed that it had alot of peach pulp in it. We tasted it and realized it was actually quite good so with the addition of some sugar we had a nice light peachy lemony drink. Mixed 50/50 with homemade sun tea with it was very yummy. It was a nice accidental byproduct of the canning process.


(And the truth comes out, now you know how messy our table usually is. Once we start experiencing landslides of circulars we know its time to clean.)


Next we did pickled zucchini slices. This would be a great way to put away those extra zucchinis that are piling up faster then you can eat them…if this is something you have to deal with. In which case I don’t really feel that sorry for you. I guess I’m a little bitter since all our zucchini plants basically bit the dust without ever doing much at all. My bitterness only grew at having to actually go to the grocery store and BUY zucchini, something no gardener should have to do.


Like the bread and butter pickles, this project involved a lot of quarter inch slicing (although I refused to make these slices diagonal, that just seemed unnecessarily difficult). I could probably make perfect quarter inch slices in my sleep (although lets hope no one finds out if that’s true).


Flash forward a few days and we are now back to watermelon. Although I had already done a batch of watermelon rind pickles I realized that I had already promised to give away as many jars as I had made which would have left none for me. So we went out and bought two more watermelons, although these were from the grocery store instead of organic.


I went through the tedious task of cutting the watermelons into one inch think slices, cutting the flesh away from the rind, peeling the rinds and cutting them into two inch long sections. These sat in salt water overnight and when we checked them the next day we found that they weren’t nearly as tender as the last batch had been after brining so these actually ended up getting simmered in the cooking liquid until they were tender. I also went the more traditional route for flavoring and opted for cinnamon instead of ginger (which my previous batch was, and I really liked).


(Look at me go!)


Since we had all that leftover watermelon (two small watermelon’s worth) I perused the Ball book for ideas and was inspired by “Zesty Watermelon Jelly” which the cookbook boasted had a “beautiful pink” color and “unique” lemongrass flavor. (Conveniently I had some lemon grass stems in the freezer.) I’m sorry to say this recipe was a lot more trouble then it was worth.

First of all it called for a jelly bag in order to make watermelon juice. We went to look for suitable fabric and we found some but it said it had a permanent press chemical applied to it and after some research we were reluctant to use it for food. So we resorted to cheesecloth but the mesh in it is so big that we ended up having to double it up to avoid getting pulp in our juice.

Finally we had our watermelon juice (which didn’t actually taste that great, kind of like pumpkin, probably the fault of bad grocery store watermelons) but we forged ahead thinking it might be improved with some sugar.

The next step in the saga was obtaining liquid pectin. I accidentally bought powdered pectin so we had to go back and get the liquid kind. And after all that what do you think happened? Our jelly didn’t gel right. We swear we followed the instructions correctly and here’s the strange thing. We had a small bit that didn’t fit in jars so that went into the fridge and that portion jelled perfectly! But our processed jars appear to be completely liquid. I tried sticking one in the fridge for a day and that helped a little but it’s not really jelled. So in despair we put them in the basement. We may try it in a few weeks to see if it has improved but if not we’ll probably just trash it.


(And I'm sorry, but those are NOT a beautiful pink color!)

But wait, there’s more!


Finally we did green tomato and apple chutney. I actually got the recipe from a great blog: The Slow Cook. We decided to go ahead and pick some of our tomatoes green because the plants are doing so badly some of them are dying with green tomatoes on the vine. At least this way we got something out of the plants. The recipe involves simmering green apples with green tomatoes, brown and white sugar, vinegar, onions, garlic, raisins, salt and lots of yummy spices. I look forward to eating it with lots of Indian food this winter (especially since I bought a huge one pound jar of curry powder).


If you’re tired from reading this post imagine how tired we are from doing all that canning? I hope with that in mind you can forgive me for going for a while without a post.