Sunday, November 30, 2008

Where Have All the Acorns Gone?

You may have noticed that my posts don't generally refer to news events but tend more towards what I'm up to. But for once these two actually intersect. The news has just confirmed what we had already noticed: there are no acorns this year! A Washington Post article explains this more in depth with some possible causes, all I know is that our squirrels seem very dependent on our charity this year.


(This feeder was full yesterday. They empty it that quick.)

The subject of feeding the squirrels always causes some debate in my house. My dad prefers to feed the birds but this generally means that in reality you are feeding the squirrels and the birds might get their leftovers. Because of this in previous years his efforts have been to reduce squirrel interference in bird feeding but this year, because of the lack of other resources, he has become more sympathetic towards the squirrels and begun to feed them also.


(The temptation to add my own idea of whatever cute little thing he might be thinking is strong but I will try to resist.)

One way we are feeding them is with a squirrel bungee feeder (the link will lead you to an ad for one but it has a good picture if you haven't seen one before). We thought this would be a good compromise because they get corn and we get entertainment. But of course they outsmarted us, they managed to get the entire cob off and proceeded to just eat it on the ground. We should have known, it is very hard to trick squirrels.


(Don't let him fool you, he has already found a way to empty this feeder too, he's just biding his time.)

I'm sure there are lots of different views about whether or not you should feed the squirrels just because there is a shortage of food this year. One could argue that this is just the natural cycle of things and feeding them this year will only increase the number that could potentially starve next year. These are good points but personally, I don't really think I could take the sight of emaciated squirrels begging on my front step. Maybe we are setting ourselves up to become the neighborhood crazy people who feed all the squirrels but if worse comes to worse we could always eat them (just kidding....or am I?) I will leave you with that thought.


(Or maybe I will leave you with this...look at those cheeks!)

Saturday, November 29, 2008

Most Fabulous Panini Ever

I will confess that when the panini craze had just begun to sweep the country I was anti-panini. My only experience with them had been from restaurants and they just didn’t work for me. I think it was because the bread soaked up too much oil or something.

But then we tried making them at home using French bread from our local grocery. These were fabulous! The crusty bread gets nice and crunchy but because it is crust in contact with the pan and not the porous sliced edge of the bread it seems to absorb less oil (or at least that’s what I tell myself).

The trick is to squish the sandwiches before they go on the pan (we use cast iron) and then place something heavy on top of them while they cook. All of this is unnecessary of course if you have one of those fancy panini presses but since I’m not allowed to get one (grumble grumble) I make do.

In addition to the wonders of French bread panini we also discovered what is possibly the best variation of this ever. This was actually a meal of desperation one night when we really didn’t feel like shopping and wanted some comfort food.

Onto the sliced French bread I spread some mustard. Then I laid on some nice sliced sharp cheddar (we like Cabot or Cracker Barrel because they are virtually lactose free and therefore acceptable for lactose intolerant people like mom). On top of that I placed some chopped scallions and here is the secret ingredient…chopped jarred jalapeƱos.

You then squish the sandwich with the palm of your hand, place it on a hot but not too hot skilled, place something heavy on top and wait for the crust to get nice and crunchy and a little brown. Then flip and repeat with that side. It should be hot enough that the crust gets crispy but not so hot that it browns before your cheesy is melty.

My accompaniment of choice for the best panini ever? My own chicken and stars soup which is also obscenely easy. I use either homemade stock or Kitchen Basics (which is also very good and comes in a no salt version) and I heat it up with a little splash of white wine. I then throw in a couple tablespoons of stars and that’s it! I also occasionally throw in an egg and make egg drop soup this way.

Sadly I don’t have a photo for you, they quite literally got devoured before I had time to think of taking one. How bout this instead?:


This is where we are keeping all the canning we did this summer. It was all made by us (with the exception of two jars of jam, can you tell which ones?). Having it all in one place to oggle makes me feel very productive.

Tuesday, November 25, 2008

Apple Drying

Farmer’s market season has just wrapped up (the last one for us locally is a Thanksgiving one which we went to this past Sunday) so this is the end of good apple season for us. We wanted to stretch it any way we could so we bought a couple of bags to dry.

Apple drying isn’t totally new to us; mom had some vague memory of doing it successfully a few years ago so we were trying to replicate that method. We tried several slicing methods. For all methods we started by peeling and coring the apples. Coring was a cinch thanks to my new apple corer!


I'm sure most of you have seen these but when I recently decided I wanted one would you believe how hard it was to find? I ended up getting it at a very nice and very pricey kitchen store in Brooklyn.

Back to slicing: the first way we tried was to use my mandoline which was quick but the slices were a little too thin and they tended to fall apart as they dried. The second method was by hand. This worked out much better because we could get thicker slices.


(These are the slices the mandoline produced. They're cute but too thin.)

An important step is to dunk them in lemony water before laying them out to dry so they don’t brown. I think we used ¼ cup lemon juice for every 2 or 4 cups of water, I can’t remember now. (Bad memory seems to be a running theme in this post...I think we need more carrots or whatever it is you are supposed to eat for memory. Oh the irony that I can't remember that either!)

We also tried several drying methods. We tried doing them on baking pans, with and without clean dishcloths underneath and also using a needle to string them up. Although stringing them up worked fine it was a lot of unnecessary work because doing them on trays with dishcloths worked just as fast.


Although we have a nice toasty fire going in our woodstove to keep them next to most of the time, I suppose you could also try putting the trays on top of a radiator or near one. They take a couple days to dry completely and they need to be flipped quite often.

Apparently (this is only hearsay) you don’t want to dry them too fast (for instance in a hot oven) because then the outside can seal while they are still damp inside, or so they say. Also you want to make sure they are completely dry before storing them to avoid mold.


(I tried using Zoe the cat for size comparison but clearly she was not in the mood.)

I’m sure these would be great for dry cereal, trail mix or baking but so far we have just been munching on them as a snack. I doubt ours will last very long but I think once they are dry they keep fairly indefinitely (although I’m sure they deteriorate in quality) so they would make good emergency rations or lightweight camping snacks. If only it was camping season. Sigh.


(I tried using Toaster the cat for size comparison too. If that look doesn't say "I'm not in the mood" I don't know what does.)

But Toaster redeemed himself by letting me get this shot of him sleeping near the fire:

P.S. I successfully bought nothing yesterday although this was more a result of the fact that I worked all day then a conscious effort. That still counts right?

Sunday, November 23, 2008

Thrifting Isn't Always Thrifty

I am evidence that shopping at thrift shops is only thrifty if you buys things you need. Of course I don’t, I buy books and clothes that I want (I’ve got more clothes and books then I can ever need.) But at least I’m not buying the stuff retail so that is kind of frugal! Right? Clearly I still need some convincing.

But can you really beat this?:


These three cookbooks were from the library’s annual sale (a dangerous thing I know, but I wouldn’t have been there had I known, it snuck up on me!). Altogether they cost a grand total of…..two dollars! That works out to 7.5 pages per penny! I’m a sucker for old 70’s/80’s cookbooks, especially the ones with pictures of jello molds.

Another exciting recent find is this necklace:


Although not used this shirt was a really good find:


It is a little boy’s thermal shirt that I found for three dollars at Job Lot (which you probably won’t know about unless you are a Rhode Island resident) which can best be described as a bargain place that gets other places’ leftovers. I was planning to refashion it but when I got home it fit so well I didn’t have to. I also got another thermal for two dollars at Salvation Army. Can you tell I don’t like chilly weather?

My final crime against thrifty thrifting was my recent button-up-shirt binge at Savers. I got five of them and here they are:


Here are some of the labels. I really couldn’t care less about what brands I wear but I always feel a little smug knowing I got brands that others pay a lot for for a fraction of the retail price.

I'm a sucker for little details:
Brown velour with brown snaps (and some shmutz)!
Gold sailor logo and gold buttons, so camp!

Finally I got a bad Christmas sweater for one of those bad Christmas sweater themed parties. Have I been invited to one yet? Of course not, but I’m going to try to convince someone to have one. (I’d throw it myself but living in your parent’s basement isn’t exactly conducive to party throwing.) If all else fails I’m going to wear it to a regular holiday party and hope every gets that it’s a joke. Or not, that would be fine too.


Even I have to admit that the bears are kind of cute, and those are real gold beads sewn on the tree. It's so bad yet so good.

In other news I made a bracelet and since we are at the peak of holiday crafting time it is for…me. I know I should be working on the projects I had planned but I found the chain and then I just couldn’t resist making the whole thing. It only took a couple hours (and that is with the distractions of watching a movie, a Nick and Nora film specifically) and I am very pleased with it. It was a fairly thrifty activity since I found the chain for a good price and I had absolutely all the other materials already. Plus I de-stashed my beading supplies a little which gives me an excuse to get more!


I actually added two more little dangly things after this picture was taken to fill in the blank spot where the clasp is.


Action shot!

P.S. This is my 50th post!

Monday, November 17, 2008

An Outfit for my Hot Water Bottle

I must profess my love for my hot water bottle. It may not be as cute as a cat but it’s a lot more cooperative. It’s done so much for me, keeping me warm and soothing my aches, that I decided to show it a little love in return.

So I made it an outfit! I wanted it make it even more snuggly and what is more snuggly than nice worn flannel? We have a pile of decrepit but soft flannel shirts which I won’t let anyone throw away because they feel so nice. I put two of them to good use by making them into this cover.

(These are the two flannel shirts before I rescued them. See the nice green stain on the right?)

(Here it is naked.)

I started by measuring my hot water bottle. I measured it top to bottom and then side to side. I added seam allowances to the measurements and then doubled the width so I could cut a piece of fabric that was the right height but twice as wide. I cut one of these each out of two different flannels. I then folded each piece of flannel over and sewed up two of the three remaining sides so I had two bags that fit over the hot water bottle with unfinished edged where the bags open at the top.

But wait there was one more thing! On one of the bags I left about a two inch gap in the stitching at the bottom. This will be important later.

I then put one bag inside the other with the “right sides” (those without raw edges) facing each other. I then pinned the unfinished edges at the tops together and sewed all the way around. Now I had a double layered bag but with raw edges. Here is where that hole comes in handy. You just reach through and pull both bags inside out. Stuff one back inside the other and you have a reversible bag that you hot water bottle fits in with no raw edges! (Well you will after you sew up that small opening at the bottom which I did by hand.)

Now all that was left was to devise a way to keep the hot water bottle in the bag. I ended up finding two pieces of cloth that had button holes on them. (They had been those ties that you get sometimes inside a shirt that are meant to allow you to roll up the sleeves and button them.) I cut the two strips to right length and sewed them together so I had a strip with a button hole at either end. I then sewed a button onto the bag right where the neck of the water bottle is (actually I sewed a button on each side since it’s reversible.)


Reversible!

Now all I do is flip the bag whichever way I want and button the collar on and my cover keeps my hot water bottle nice and cozy so it can keep me nice and cozy! I would make these as gifts but I don’t think I know anyone else who uses a hot water bottle.

Sunday, November 16, 2008

Homemade Bread and Other Food Processor Wonders

Believe it or not one of the most expensive prepared foods we buy is bread. So we decided to try and make as much of our bread from scratch as possible. This was of course greatly aided by the recent arrival of a food processor (yay!) from my cousin Rog (thanks Rog!).

Although a food processor is not necessary for bread making at all it is mighty helpful for kneading if you have scrawny weak arms like me. The basic recipe that came with the food processor is actually quite good. You proof your yeast in warm water with sugar and in the mean time you mix your flour, salt and fat in the processor. You then use the feed spout to slowly pour in the yeasty water (to which you add some ice water) and then let it mix for a few seconds until it is fully kneaded. Then it goes into a bowl to rise, gets shaped, rises again and then is ready to bake.

We have used this recipe to make basic white bread but also bread with some whole wheat flour mixed in, rolls and Italian type loafs.

One of my favorite specialty breads are those long skinny crusty kalamata olive loaves you always see at farmer’s markets for five bucks a pop. I wanted to try to make my own version so I made up a batch of the usual dough but for some reason I thought I should put the olives in with the dry ingredients before adding the liquid. So instead of a lovely white loaf studded with olives I ended up with an interestingly purple colored loaf that had a vague flavor of olives. Oh and it was also gigantic. But still good! (Note to self: add olives AFTER kneading dough with food processor.)

The giant kalamata flavored loaf. You think it's ugly? Check out these rolls:


We have an astounding capacity to make ugly bread (but at least it tastes good).

My other favorite specialty bread is cinnamon raisin bread. I survived much of college eating it with peanut butter and bananas on top for breakfast. So when we went on our bread making kick I knew I had to make myself some. I made regular white dough and after it had been allowed to rise once I smooshed it out into a rectangle. I then sprinkled on cinnamon sugar and a bunch of raisins. I rolled this up and put it in the bread pan to rise again. It was fabulous. I would also like to introduce you to the best peanut butter in the world. It is so fabulous because not only does it contain only peanuts but it is also very fresh. Unfortunately you probably shouldn't bother looking for it because it comes from Providence and I have only found it in a few places in Rhode Island. But if you are a RI resident find it!


(Sorry about the blurry picture but this is the fabulous peanut butter.)
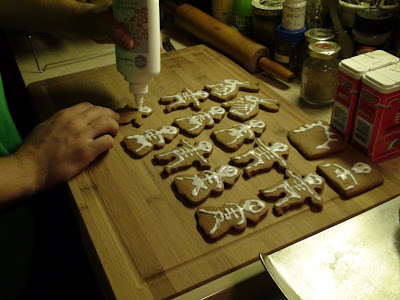

Toasted with peanut butter and bananas on top. Mmmm...must be served with a glass of very cold milk.

We’ve also used the food processor to make cookies. These were actually for an after school program my boyfriend works at and he wanted a Halloween themed snack that wasn’t candy. We got the idea for the icing decoration here (although I actually got the link from this fun site) but the recipe for the cookies here. They were excellent and moist, not like some of those gingerbread cookies that you suspect are designed more for their structural integrity then edibleness.

Naked cookies.


My boyfriend hard at work decorating the cookies.


We had a bunny cookie cutter so I wanted bunny skeletons.


When is a bunny not a bunny? When it's a whale.

I have to admit that the icing wasn’t actually homemade but this stuff that came in a squeeze bottle that was scarily reminiscent of Elmer’s glue. You just pop the bottle in the microwave and squeeze away. Although expensive it was quite handy and dries nice and hard so it doesn’t get smudged.

Besides baking the food processor is also awesome for vegetables. I love that it shreds, I’ve started making more coleslaw then I ever thought I would. We also used it to (finally!) deal with those sugar pumpkins we bought for Halloween decorations. We used Pioneer Woman’s method to make frozen pumpkin puree. There are now 5 two cup bags residing in our freezer waiting for someone to make them into some sort of delicious desert.


Next up for the food processor: ground meat. I'm making my own meatballs and I don't feel like paying $2.99 a pound for ground chicken so I'm going to do it myself!

Thursday, November 13, 2008

The Conclusion to the No Oil Heat Until November Experiment

We are well into November and those of you with a good memory may recall that I mentioned a plan to attempt going without using our oil heat until November. The good news is that we did! The bad news is that some of the related experiments we tried didn’t work out as well as we’d hoped.

So first here is what worked for keeping us warm:
1. Obviously the wood stove helped a lot. The only downside to this is that someone has to be around all the time to keep it going.
2. Hot water bottles and or kitties. Nothing makes a bed more inviting then a hot water bottle and or the more natural alternative: a cat. The only problem with the cats is they tend to have more free will then a hot water bottle.
3. Baking things. Our decision to start making as much of our own bread as possible was conveniently timed because using the oven more does its part to warm up the kitchen.

Between all these things we managed to keep the upstairs warm enough that it was livable. The only problem that remained was the basement which didn’t benefit from the woodstove upstairs. If only hot air went down instead of up! Unfortunately I haven’t figured out a way to change the laws of physics so we had to settle for setting up a network of fans to push the warm air down the basement stairs.

As an experiment this was amazingly successful. We were able to raise the temperature downstairs by 5 degrees! As a practical setup this wasn’t so great because 5 fans probably use a good deal of electricity and they also make maneuvering the stairs rather difficult.


But because of our initial success with fans we decided to try to approximate a hot air vent leading to the basement. We bought 2 lengths of dryer duct. At one end we duct taped the tubing to a box which was stapled to the wall (very elegant) near the stove. We then arranged the tubing so it went down the stairs and along the ceiling and in through a convenient hole in the wall into my basement apartment. Once inside the apartment it was attached to another cardboard box except instead of being open this one had a small fan at the end. The theory was that the fan would pull hot air through the tube into the basement.


When we turned it on we discovered that the fan was barely powerful enough to suck the air down through the tube so we made some adjustments and added a much powerful fan. And we gave it a full test run this time only to discover….the temperature downstairs didn’t change one degree.

So this obviously still needs some work if it is going to be helpful at all. We have since resorted to using the heat but not very much. The other advantage is that if we were to lose electricity for an extended period of time, perhaps because of a blizzard, we know that the woodstove could at least keep us warm upstairs (as long as all our wood isn’t buried under snow).

Thursday, November 6, 2008

Better Late Then Never: Halloween Costume Edition

I really wanted to post about my Halloween costume creations earlier but you see I had to wait for the photos to come back from the printers...and they were arriving by horse and buggy...and there was a blizzard, so that is why this is so late.

Obviously I'm lying and it's because there is really no excuse for the delay. Although to my credit these costumes weren't actually worn until after Halloween and after that there was the excitement of the election and I was sickly. But better late then never so here you go:

We got invited to a Halloween party and of course my boyfriend, being the eternal 5 year old that he is, decided the day before that he wanted to be Rorschach from the Watchmen. (If you aren't familiar with the graphic novel you can just watch the movie that will be out soon but not soon enough.)

At first I was going to veto this since I didn't feel like going on a hunt for a reasonably priced trench coat and hat. That was until my dad informed me that he had a tan trench coat which turned out to be perfect. I then recalled that some old man had left that exact hat at work so after grabbing that all we needed was the mask and a white scarf. For the mask I bought a pair of white pantyhose onto which my boyfriend drew a Rorschach-ish pattern. For the white scarf we ripped some white fabric from an old test run of a pattern. Grand total for his costume: $4 for the pantyhose. And after all that would you believe only one person even figured out who he was supposed to be?


Even out of context this is a pretty creepy costume, except of course for the mojito. He wasn't very good about staying in character. Plus he had to lift his mask to drink, which is always something that should be taken into consideration when designing a Halloween party costume.

My costume on the other hand was much more practical. I looked at my already existing wardrobe until inspiration struck. I already had a black shirt and black skirt that were very witchy. I also happened to own a pair of black and white striped knee high socks and some very witchy high heels. After that all I needed was a witch hat. After a trip to the store I realized the only hats left were not only children's but also very poorly constructed. I knew I could do better so on the spot I decided to make myself a cute mini witch hat.


(This is my fabulous work table, it may not be easy on the knees but it's generally fairly clear.)

For this I bought: black felt, black ribbon, a giant hair clip and some black beads. I experimented with paper to design the hat, then cut it out and sewed it together. I used the ribbon as a hat band and the beads for decoration. I then cut four slits out of the bottom panel to form two loops to slip the hair clip through and I was done! (I make it sound simple but it really took hours between the experimenting with the design and the tedious sewing. Plus I would have saved time if I had sewed the beads on before I had put the hat mostly together.)


Grand total for my costume: probably about $10 for materials for the hat but I have a lot of it left over.

Monday, November 3, 2008

Tagged

Bad blogger! Not only have I been bad about posting...I was also tagged and have yet to pass it on. I blame the election excitement and being sickish. I was tagged by Darling Petunia which means I now have to think of seven weird facts about myself...which shouldn't be too hard.

The Rules:

1. Link to the person that tagged you, and post the rules on your blog.
2. Share 7 random and/or weird facts about yourself.
3. Tag 7 people at the end of your post, and include links to their blogs.
4. Let each person know they have been tagged by leaving a comment on their blog.

Fact #1

I, like the person who tagged me, have large feet. You might be wondering what I consider large. I think size 10 is pretty huge for someone who is only 5'4''. But here is the weird part. It isn't my feet that are long...its my toes. My friends have sometimes referred to them as finger toes. In fact if I ever lose a pinkie I am planning to just replace it with a toe. Also, they are very useful for picking things up...almost prehensile.

Fact #2

I like hip-hop...a lot. It might not be the music you'd expect for someone who spends most of her spare time canning. My favorite artists are (in no particular order): Kanye West, Dead Prez, K-OS, Common, Blackstar (Mos Def and Talib Kweli), Lupe Fiasco, Saul Williams and Tanya Stephens (who is more reggae/hip-hop).

Fact #3

I have a secret passion for graphic novels (although not anime...I'm not that nerdy [yes I went there]). My favorite author is James Kochalka and I don't mind if you call them comics.

Fact #4

I've been dating my boyfriend for over four years and he doesn't give a rat's ass about the things I blog about (except he already ate all my strawberry jelly). I have to yell at him just to keep up with my blog. But he's a fabulous artist (he did my banner) so it's forgivable.

Fact #5

I have a strange predilection towards any and all items of kelly green clothing. I've got at least 4 or 5 t-shirts of that color. And I'm not even Irish!

Fact #6

My family represents one of the highest concentrations of useless degrees known to man. My dad got his degree to teach English (never did) and my mom got hers in anthropology (guess what she never did?!). I got my degree in philosophy with a minor in English (very unlikely to be used) and my boyfriend is working to get his bachelor of fine arts (sadly the most likely to be used although not for much profit).

Fact #7

I don't like cooked orange vegetables. Carrots, squash, sweet potato...yuck! (Although I make an exception for pumpkin pie, although I don't really like the crust.)

People I am tagging: (This is a little harder...I'm new to blogging so I'm going to wimp out and only tag a couple people).

Emma at Erl The Girl's Blog (Funny coincidence: she did a version of my t-shirt skirt as did Darling Petunia who tagged me! She also made an adorable version for her dog!)

Lacy at Razor Family Farms

Amanda who might not be so happy with me for doing this but t.s.